写在前面
算法设计与分析课程大作业为实现一个迷宫游戏,我觉得挺有意思的,于是做一下记录。
java的图形化编程没怎么学,我打算采用js来实现,使用网页编程的好处是比较轻量,并且自由度比较高,也挺适合这类小游戏的,但最主要的原因还是java图形化编程不太会。
前期准备
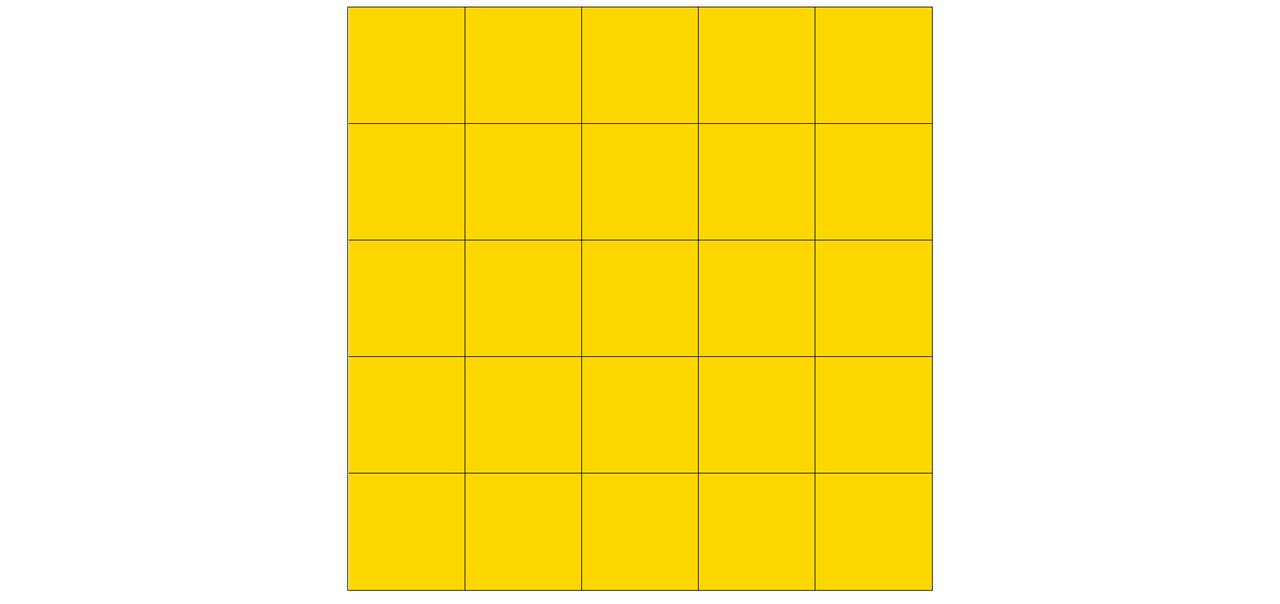
首先引入jq简化开发,生成迷宫的基本思路是外面套一层div作为包裹,中间再包裹上小div,当然外层div拥有边框,内部的小div就需要对边框进行处理:
- 所有div加上右边和下边的边框
- 最后一行去除下边框
- 最后一列去除右边框
html结构如下:
1
2
3
4
5
6
7
8
9
10
11
12
13
14
15
16
17
18
19
20
21
22
23
24
25
26
27
28
29
30
31
32
33
34
35
36
37
38
39
40
| <body>
<div class="maze-outer">
<div class="first-grid">
<div class="second-grid"></div>
<div class="second-grid"></div>
<div class="second-grid"></div>
<div class="second-grid"></div>
<div class="second-grid"></div>
</div>
<div class="first-grid">
<div class="second-grid"></div>
<div class="second-grid"></div>
<div class="second-grid"></div>
<div class="second-grid"></div>
<div class="second-grid"></div>
</div>
<div class="first-grid">
<div class="second-grid"></div>
<div class="second-grid"></div>
<div class="second-grid"></div>
<div class="second-grid"></div>
<div class="second-grid"></div>
</div>
<div class="first-grid">
<div class="second-grid"></div>
<div class="second-grid"></div>
<div class="second-grid"></div>
<div class="second-grid"></div>
<div class="second-grid"></div>
</div>
<div class="first-grid">
<div class="second-grid"></div>
<div class="second-grid"></div>
<div class="second-grid"></div>
<div class="second-grid"></div>
<div class="second-grid"></div>
</div>
</div>
<div class="message">游戏成功!</div>
</body>
|
样式如下:
1
2
3
4
5
6
7
8
9
10
11
12
13
14
15
16
17
18
19
20
21
22
23
24
25
26
27
28
29
30
31
32
33
34
35
36
37
38
39
40
41
42
43
44
45
| <style>
* {
margin: 0;
padding: 0;
}
.maze-outer {
margin: 10px auto;
height: 700px;
width: 700px;
border: 1px solid black;
}
.first-grid {
width: 100%;
height: 140px;
display: flex;
}
.second-grid {
width: 140px;
height: 100%;
background-color: gold;
border-right: 1px solid black;
border-bottom: 1px solid black;
box-sizing: border-box;
}
.first-grid:last-child .second-grid {
border-bottom: none;
}
.second-grid:last-child {
border-right: none;
}
.none-right {
border-right: none;
}
.none-bottom {
border-bottom: none;
}
.message {
position: fixed;
top: 25px;
left: 50%;
transform: translateX(-50%);
font-size: 45px;
display: none;
}
</style>
|
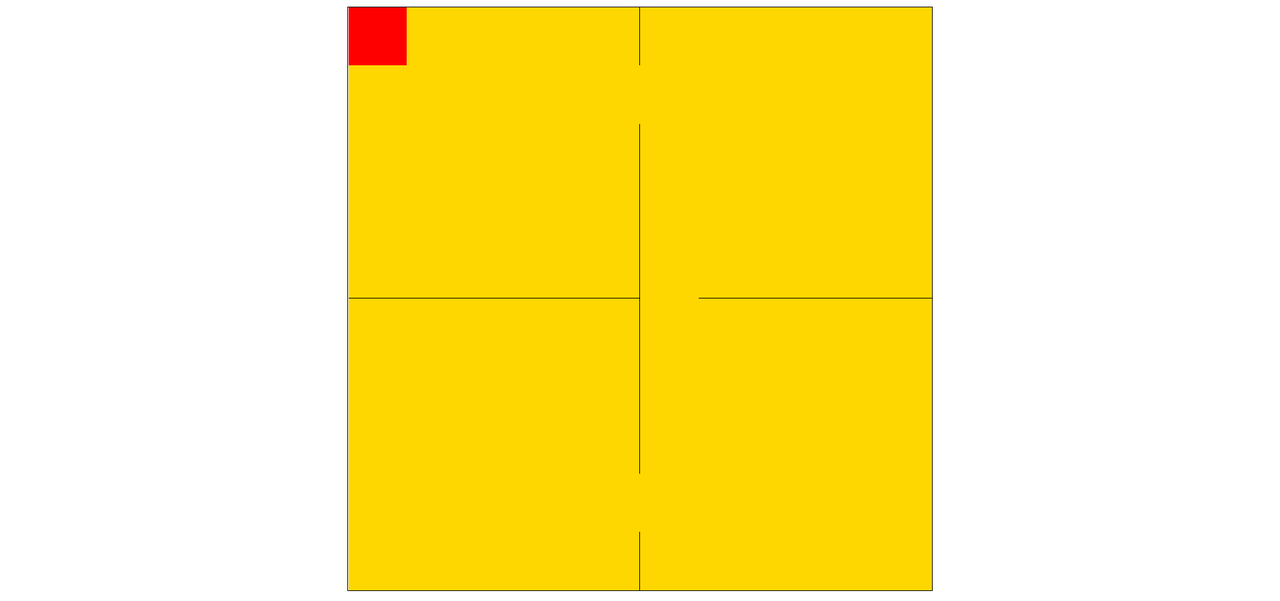
最终效果如下:
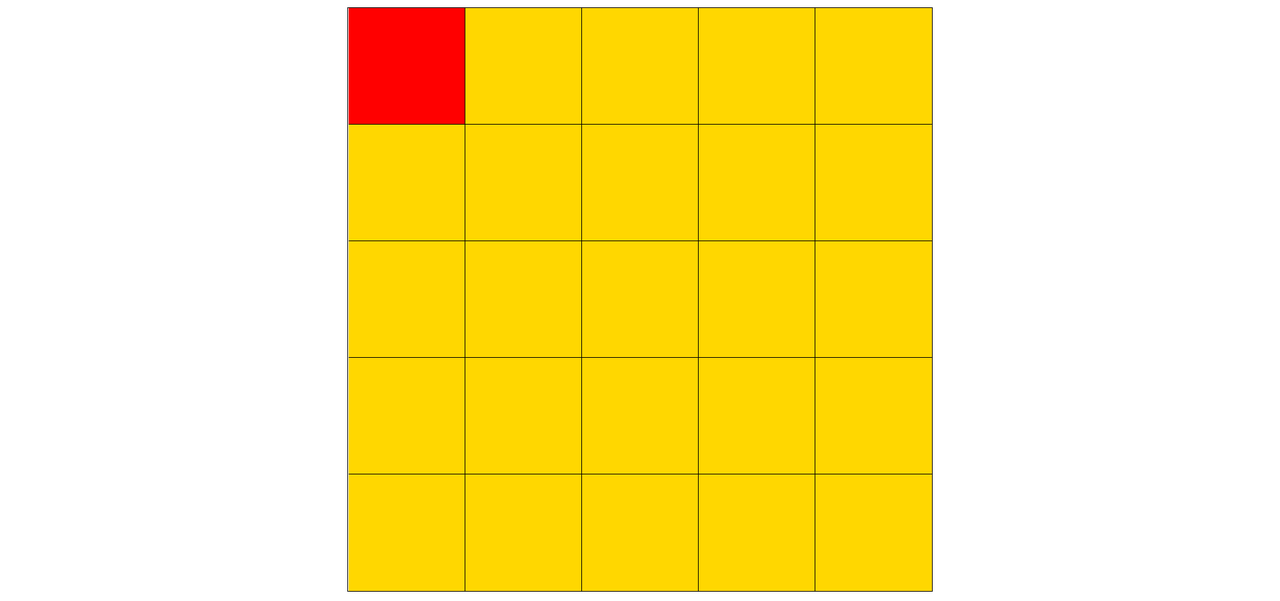
引入人物样式:
1
2
3
4
5
| <style>
.wolfman {
background-color: red;
}
</style>
|
最终效果如下:
准备全局变量:
1
2
3
4
5
6
7
8
9
10
11
|
let mazeOuter = $(".maze-outer");
let message = $(".message");
let maze = [];
let n = 10;
let x = 0;
let y = 0;
|
以上基本的准备工作已经完成,下面介绍迷宫生成算法。
迷宫生成算法
递归回溯算法
算法思想
每次把新找到的未访问迷宫单元作为优先,寻找其相邻的未访问过的迷宫单元,直到所有的单元都被访问到。通俗的说,就是从起点开始随机走,走不通了就返回上一步,从下一个能走的地方再开始随机走。
算法步骤
1
2
3
4
5
6
7
8
9
10
| 1.将起点作为当前迷宫单元并标记为已访问
2.当还存在未标记的迷宫单元,进行循环
1.如果当前迷宫单元有未被访问过的的相邻的迷宫单元
1.随机选择一个未访问的相邻迷宫单元
2.将当前迷宫单元入栈
3.移除当前迷宫单元与相邻迷宫单元的墙
4.标记相邻迷宫单元并用它作为当前迷宫单元
2.如果当前迷宫单元不存在未访问的相邻迷宫单元,并且栈不空
1.栈顶的迷宫单元出栈
2.令其成为当前迷宫单元
|
具体实现
1
2
3
4
5
6
7
8
9
10
11
12
13
14
15
16
17
18
19
20
21
22
23
24
25
26
27
28
29
30
31
32
33
34
35
36
37
38
39
40
|
function initMazeByDfs() {
let stack = [];
initMazeArray();
maze[0][0].visited = true;
let i = 0, j = 0;
while (isAllVisited(maze)) {
let unVisited = [];
if (i - 1 >= 0 && maze[i - 1][j].visited === false) {
unVisited.push(maze[i - 1][j]);
}
if (j + 1 < n && maze[i][j + 1].visited === false) {
unVisited.push(maze[i][j + 1]);
}
if (i + 1 < n && maze[i + 1][j].visited === false) {
unVisited.push(maze[i + 1][j]);
}
if (j - 1 >= 0 && maze[i][j - 1].visited === false) {
unVisited.push(maze[i][j - 1]);
}
if (unVisited.length !== 0) {
let r = getRandomGrid(unVisited);
r.visited = true;
stack.push(maze[i][j]);
removeWall(maze[i][j], r);
i = r.i;
j = r.j;
} else if (stack.length !== 0) {
let r = stack.pop();
i = r.i;
j = r.j;
}
}
}
|
其中所用函数:
1
2
3
4
5
6
7
8
9
10
11
12
13
14
15
16
17
18
19
20
21
22
23
24
25
26
27
28
29
30
31
32
33
34
35
36
37
38
39
40
41
42
43
44
45
46
47
48
49
50
|
function initMazeArray() {
for (let i = 0; i < n; i++) {
let m = [];
for (let j = 0; j < n; j++) {
let item = {class: "second-grid", visited: false, i: i, j: j};
m.push(item);
}
maze.push(m);
}
}
function isAllVisited(maze) {
for (let i = 0; i < n; i++) {
for (let j = 0; j < n; j++) {
if (!maze[i][j].visited) {
return true;
}
}
}
return false;
}
function getRandomGrid(unVisited) {
let index = Math.floor(Math.random() * unVisited.length);
return unVisited[index];
}
function removeWall(cur, nei) {
if (cur.i - 1 >= 0 && cur.i - 1 === nei.i) {
nei.class += " none-bottom";
}
if (cur.j + 1 < n && cur.j + 1 === nei.j) {
cur.class += " none-right";
}
if (cur.i + 1 < n && cur.i + 1 === nei.i) {
cur.class += " none-bottom";
}
if (cur.j - 1 >= 0 && cur.j - 1 === nei.j) {
nei.class += " none-right";
}
}
|
注意判断边界条件。
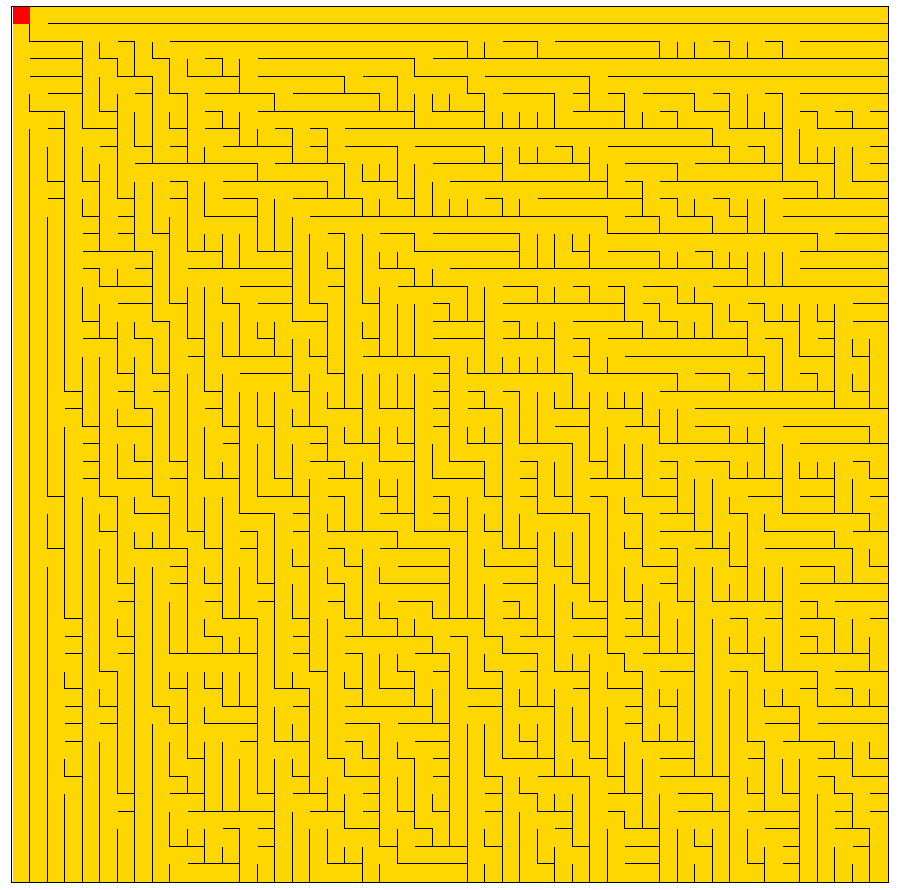
生成效果
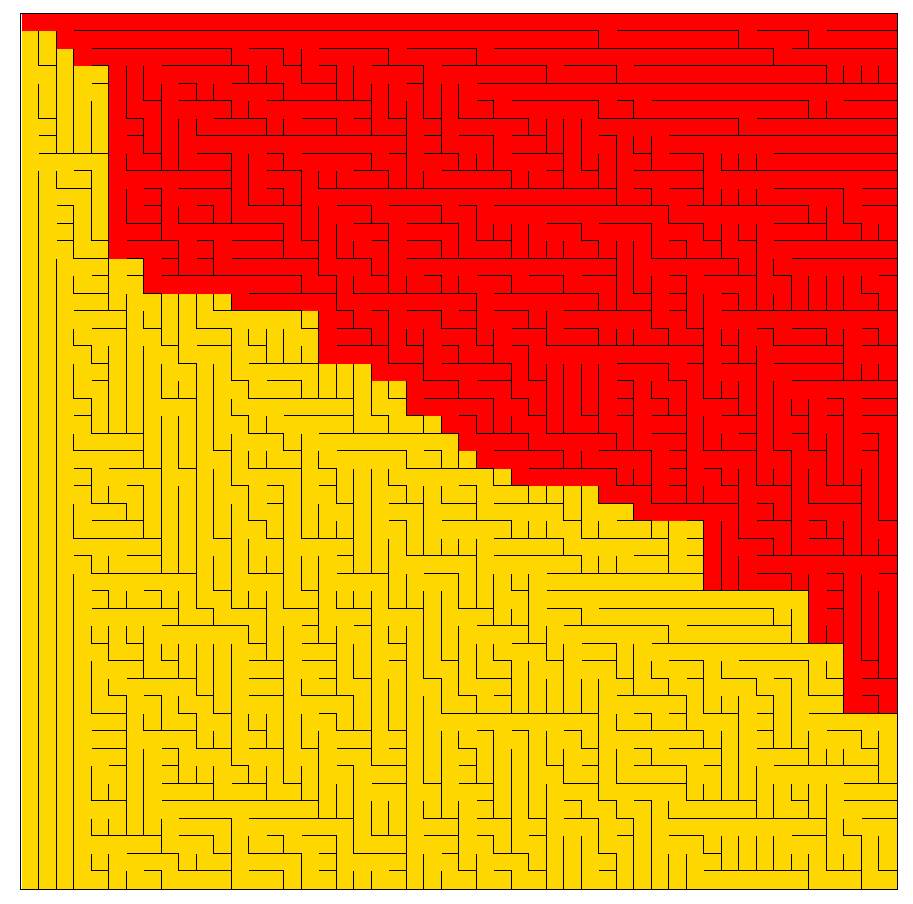
深度优先法生成的迷宫极度扭曲,有着一条明显的主路。
随机prim算法
算法思想
类似图论中的prim算法,随机prim算法将单元格当作节点,墙作为边,可生成从起点到终点的路径。
算法步骤
1
2
3
4
5
6
7
| 1.让迷宫全是墙.
2.选一个单元格作为迷宫的通路,然后把它的邻墙放入列表
3.当列表里还有墙时
1.从列表里随机选一个墙,如果这面墙分隔的两个单元格只有一个单元格被访问过
1.那就从列表里移除这面墙,即把墙打通,让未访问的单元格成为迷宫的通路
2.把这个格子的墙加入列表
2.如果墙两面的单元格都已经被访问过,那就从列表里移除这面墙
|
具体实现
1
2
3
4
5
6
7
8
9
10
11
12
13
14
15
16
17
18
19
20
21
22
23
24
25
26
27
28
29
30
| function initMazeByRandomPrim() {
initMazeArray();
let list = [];
maze[0][0].visited = true;
addWallToList(list, maze[0][0]);
while (list.length !== 0) {
let index = Math.floor(Math.random() * list.length);
let w = list[index];
if (w.type === "right" && w.j + 1 < n) {
if ((maze[w.i][w.j].visited ^ maze[w.i][w.j + 1].visited)) {
maze[w.i][w.j + 1].visited = true;
maze[w.i][w.j].class += " none-right";
addWallToList(list, maze[w.i][w.j + 1]);
} else if (maze[w.i][w.j].visited && maze[w.i][w.j + 1].visited) {
list.splice(index, 1);
}
} else if (w.type === "bottom" && w.i + 1 < n) {
if ((maze[w.i][w.j].visited ^ maze[w.i + 1][w.j].visited)) {
maze[w.i + 1][w.j].visited = true;
maze[w.i][w.j].class += " none-bottom";
addWallToList(list, maze[w.i + 1][w.j]);
} else if (maze[w.i][w.j].visited && maze[w.i + 1][w.j].visited) {
list.splice(index, 1);
}
}
}
}
|
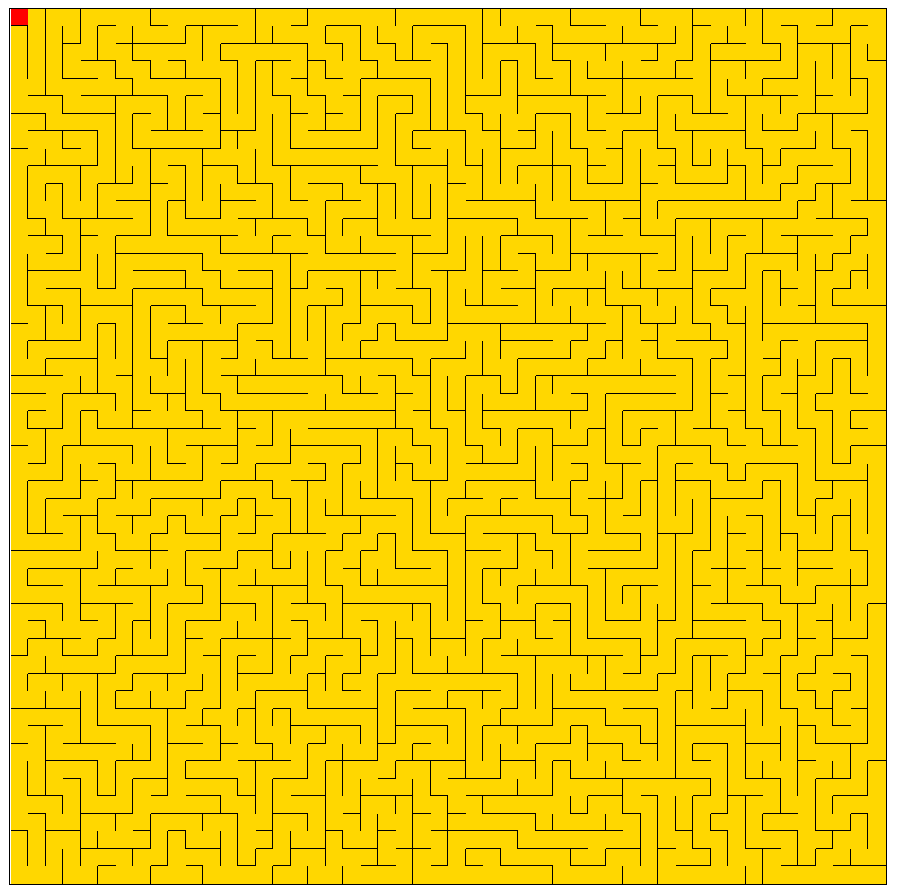
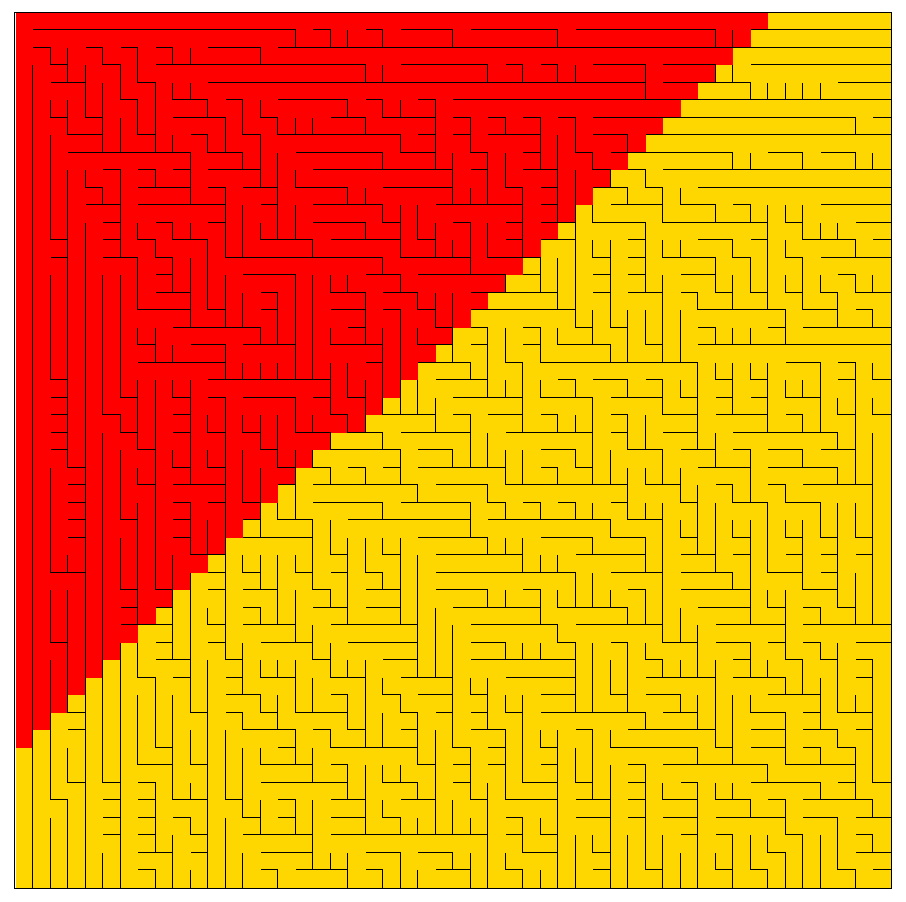
生成效果
相对于深度优先的算法,Prim随机算法不是优先选择最近选中的单元格,而是随机的从所有的列表中的单元格进行选择,新加入的单元格和旧加入的单元格同样概率会被选择,新加入的单元格没有有优先权。因此其分支更多,生成的迷宫更复杂,难度更大,也更自然。
区域划分算法
算法思想
把空间用十字分成四个子空间,然后在三面墙上挖洞(为了确保连通),之后对每个子空间继续做这件事直到空间不足以继续分割为止。
算法步骤
1
2
3
4
5
| 1.初始化数组没有墙
2.判断数组是否满足条件,不满足则返回
1.随机选择一行和一列加入墙,并挖洞
2.将数组划分为四块
3.递归绘制每一块
|
具体实现
1
2
3
4
5
6
7
8
9
10
11
12
13
14
15
16
17
18
19
20
21
22
23
24
25
|
function initMazeByDivideAndConquer() {
initMazeArrayInDivideAndConquer();
initMazeByRecursion(0, n - 2, 0, n - 2);
}
function initMazeByRecursion(xStart, xEnd, yStart, yEnd) {
if (xStart >= xEnd || yStart >= yEnd) {
return;
}
let row = getRandom(xStart, xEnd);
let col = getRandom(yStart, yEnd);
drawLine(xStart, xEnd, yStart, yEnd, row, col);
initMazeByRecursion(xStart, row - 1, yStart, col - 1);
initMazeByRecursion(xStart, row - 1, col + 1, yEnd);
initMazeByRecursion(row + 1, xEnd, col + 1, yEnd);
initMazeByRecursion(row + 1, xEnd, yStart, col - 1);
}
|
其中所用函数:
1
2
3
4
5
6
7
8
9
10
11
12
13
14
15
16
17
18
19
20
21
22
23
24
25
|
function drawLine(xStart, xEnd, yStart, yEnd, row, col) {
let r1 = getRandom(xStart, row);
let r2 = getRandom(col + 1, yEnd);
let r3 = getRandom(row + 1, xEnd);
let r4 = getRandom(yStart, col);
for (let i = xStart; i < xEnd + 2; i++) {
for (let j = yStart; j < yEnd + 2; j++) {
if (i === row && j !== r2 && j !== r4) {
maze[i][j].class = maze[i][j].class.replace(/none-bottom/, "");
}
if (j === col && i !== r1 && i !== r3) {
maze[i][j].class = maze[i][j].class.replace(/none-right/, "1");
}
}
}
}
function getRandom(n, m) {
return Math.floor(Math.random() * (m - n) + n + 0.5);
}
|
区域划分算法代码实现有一些小bug😥😥😥,有时生成出来的迷宫没有完全连通,有个别单元格是封闭的…
生成效果
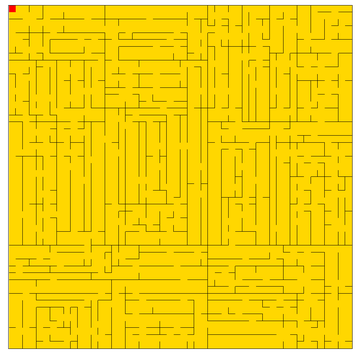
区域划分算法生成的迷宫有很明显的直路,这是因为在生成过程中,墙壁是从大到小生成,并且通路是通过挖洞来实现的。
人物移动实现
通过以上算法,我们实现了迷宫的生成,接下来我们简单实现一下游戏交互功能,基本思路为:
键盘监听
注册键盘监听事件:
1
| $(window).bind('keydown', listenKeyDown);
|
其中所用函数:
1
2
3
4
5
6
7
8
9
10
11
12
13
14
15
16
17
18
19
20
21
22
23
24
25
26
27
28
29
30
31
32
|
function listenKeyDown(event) {
let type = event.originalEvent.code;
switch (type) {
case "ArrowUp":
if (x - 1 >= 0 && getCubePosition(x - 1, y).className.indexOf("none-bottom") > 0) {
removeCubePosition(x, y);
changeCubePosition(--x, y);
}
break;
case "ArrowRight":
if (y + 1 < n && getCubePosition(x, y).className.indexOf("none-right") > 0) {
removeCubePosition(x, y);
changeCubePosition(x, ++y);
}
break;
case "ArrowDown":
if (x + 1 < n && getCubePosition(x, y).className.indexOf("none-bottom") > 0) {
removeCubePosition(x, y);
changeCubePosition(++x, y);
}
break;
case "ArrowLeft":
if (y - 1 >= 0 && getCubePosition(x, y - 1).className.indexOf("none-right") > 0) {
removeCubePosition(x, y);
changeCubePosition(x, --y);
}
break;
default:
break;
}
}
|
其中listenKeyDown函数需要注意移动时判断边界条件:
1
2
3
4
5
6
7
8
9
10
11
12
13
14
15
16
17
18
19
20
21
22
23
24
25
26
27
28
29
30
|
function getCubePosition(i, j) {
if (i < 0 || j < 0 || i >= n || j >= n) {
return;
}
let firstChildren = mazeOuter.children();
let secondChildren = $(firstChildren[i]).children();
return secondChildren[j];
}
function removeCubePosition(i, j) {
if (i < 0 || j < 0 || i >= n || j >= n) {
return;
}
let firstChildren = mazeOuter.children();
$($(firstChildren[x]).children()[y]).removeClass("wolfman");
}
function changeCubePosition(i, j) {
if (i < 0 || j < 0 || i >= n || j >= n) {
return;
}
let firstChildren = mazeOuter.children();
$($(firstChildren[i]).children()[j]).addClass("wolfman");
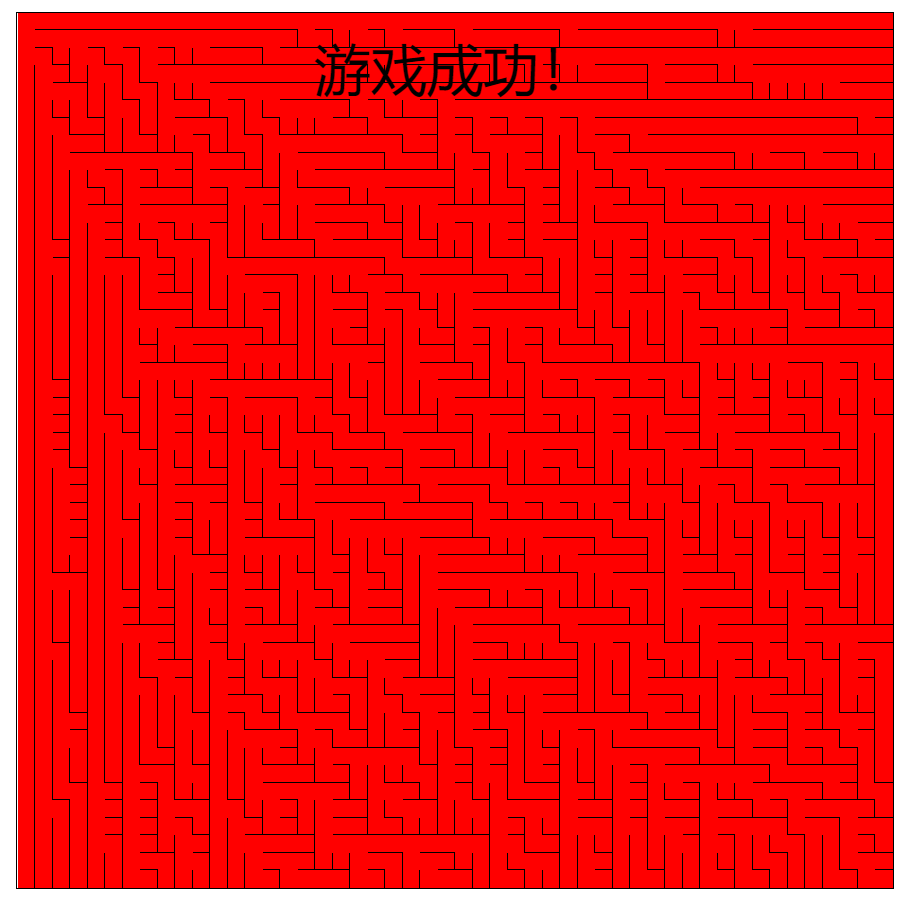
if (i === n - 1 && j === n - 1) {
message.fadeIn();
}
}
|
人物移动
人物移动我们只需要改变移动位置的颜色即可,并不需要实现真实的位置移动。
以上代码即可实现通过上下左右键控制人物的移动了!🤗🤗🤗
迷宫路径搜索
接下来我们实现迷宫路径的自动寻路,一般有两种方式,深度优先搜索和广度优先搜索。
深度优先搜索
算法思想
依次向上右下左进行递归,直到没有路,则回退。
算法步骤
1
2
3
| 1.判断是否超出边界,超出则回退
2.标记当前位置已访问并加入记录路径
3.按上右下左依次判断是否能访问,能则继续递归
|
具体实现
1
2
3
4
5
6
7
8
9
10
11
12
13
14
15
16
17
18
19
20
21
22
23
24
25
26
27
28
29
30
31
32
33
34
35
36
37
38
39
40
41
42
43
44
45
46
|
function getShortestPathDFS(start, end) {
let path = [];
for (let i = 0; i < n; i++) {
for (let j = 0; j < n; j++) {
maze[i][j].visited = false;
}
}
dfs(maze[start][end], path);
let s = 0;
let timer = setInterval(function () {
if (s === path.length || (path[s].i === n - 1 && path[s].j === n - 1)) {
clearInterval(timer);
return;
}
s++;
x = path[s].i;
y = path[s].j;
changeCubePosition(x, y);
}, 20);
}
function dfs(start, path) {
if (start.i < 0 || start.j < 0 || start.i >= n || start.j >= n) {
return;
}
start.visited = true;
path.push(start);
if (start.i - 1 >= 0 && !maze[start.i - 1][start.j].visited && getCubePosition(start.i - 1, start.j).className.indexOf("none-bottom") > 0) {
dfs(maze[start.i - 1][start.j], path);
}
if (start.j + 1 < n && !maze[start.i][start.j + 1].visited && getCubePosition(start.i, start.j).className.indexOf("none-right") > 0) {
dfs(maze[start.i][start.j + 1], path);
}
if (start.i + 1 < n && !maze[start.i + 1][start.j].visited && getCubePosition(start.i, start.j).className.indexOf("none-bottom") > 0) {
dfs(maze[start.i + 1][start.j], path);
}
if (start.j - 1 >= 0 && !maze[start.i][start.j - 1].visited && getCubePosition(start.i, start.j - 1).className.indexOf("none-right") > 0) {
dfs(maze[start.i][start.j - 1], path);
}
}
|
注意判断边界条件。
最终效果
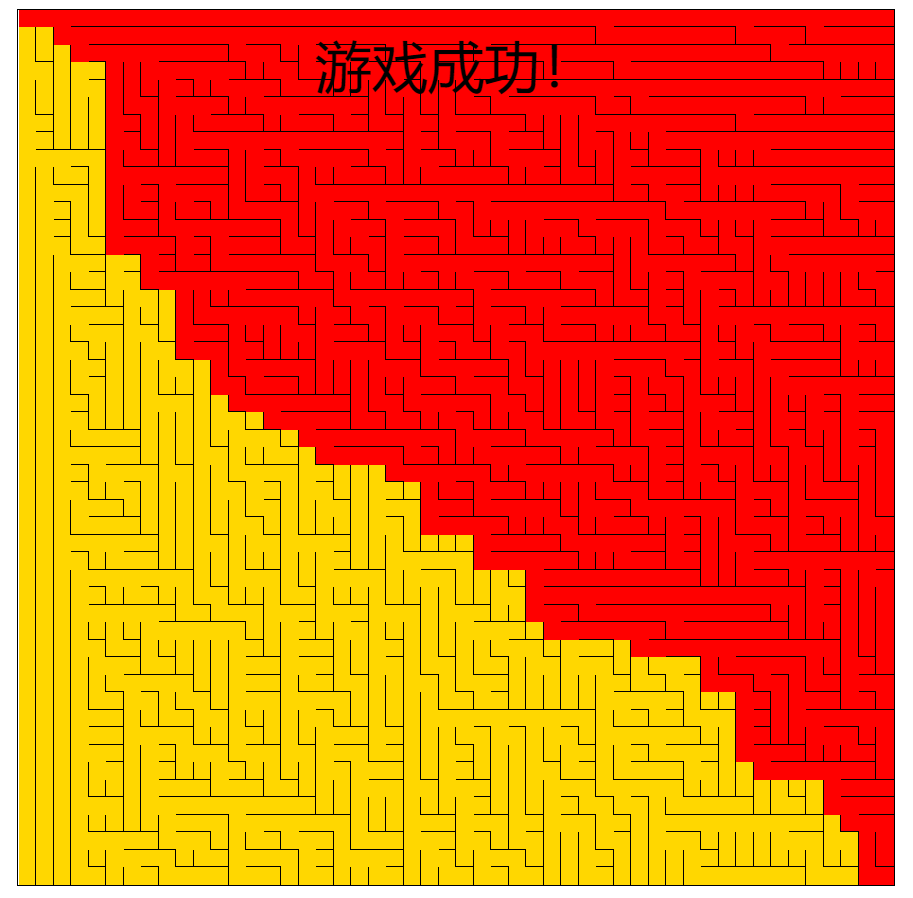
观察可以看到,深度优先搜索和代码的关联度比较大,我们深度遍历的次序是上->右->下->左,那么最终形成的路径就会优先遍历上右部分,我们还可以观察到,深度优先搜索到达终点后是可以提前结束的。
回溯记录路径
算法思想
以上代码可以实现,深度优先遍历查找终点,我们可以使用回溯法找到的路径。具体思想为,如果当前单元格不是终点并且周围单元格都无法访问(包含不能访问和已经访问过),则表明该单元格不是路径中的单元格,将其移出结果数组即可。
因为回溯找到一条路径就直接退出了,那么这条路径不能保证是最短路径,后面的广度优先搜索会讲到如何求得最短路径。
算法步骤
1
2
3
4
5
| 1.判断递归条件(是否越界或是否已找到终点)是否满足,满足则返回
2.将该单元格标记为已访问并入栈
3.判断该单元格是否为终点,是则标记已找到终点
4.判断上右下左是否能访问,能则继续递归
5.判断条件(栈不为空且未找到终点),条件满足则出栈
|
具体实现
将深度优先搜索的代码修改一下即可。
1
2
3
4
5
6
7
8
9
10
11
12
13
14
15
16
17
18
19
20
21
22
23
24
25
26
27
28
29
30
31
32
33
34
35
36
37
38
39
40
41
42
43
44
45
46
47
48
49
50
51
52
53
54
55
56
57
|
function dfs(start, path) {
if (start.i < 0 || start.j < 0 || start.i >= n || start.j >= n || dfsFindPathFlag) {
return;
}
start.visited = true;
path.push(start);
if (start.i === n - 1 && start.j === n - 1) {
dfsFindPathFlag = true;
return;
}
if (start.i - 1 >= 0 && !maze[start.i - 1][start.j].visited && getCubePosition(start.i - 1, start.j).className.indexOf("none-bottom") > 0) {
dfs(maze[start.i - 1][start.j], path);
}
if (start.j + 1 < n && !maze[start.i][start.j + 1].visited && getCubePosition(start.i, start.j).className.indexOf("none-right") > 0) {
dfs(maze[start.i][start.j + 1], path);
}
if (start.i + 1 < n && !maze[start.i + 1][start.j].visited && getCubePosition(start.i, start.j).className.indexOf("none-bottom") > 0) {
dfs(maze[start.i + 1][start.j], path);
}
if (start.j - 1 >= 0 && !maze[start.i][start.j - 1].visited && getCubePosition(start.i, start.j - 1).className.indexOf("none-right") > 0) {
dfs(maze[start.i][start.j - 1], path);
}
if (path.length !== 0 && !dfsFindPathFlag) {
path.pop();
}
}
function getShortestPathDFS(start, end) {
let path = [];
for (let i = 0; i < n; i++) {
for (let j = 0; j < n; j++) {
maze[i][j].visited = false;
}
}
dfs(maze[start][end], path);
let s = 0;
x = path[s].i;
y = path[s].j;
changeCubePosition(x, y);
timer = setInterval(function () {
if (s === path.length || (path[s].i === n - 1 && path[s].j === n - 1)) {
clearInterval(timer);
return;
}
s++;
x = path[s].i;
y = path[s].j;
changeCubePosition(x, y);
}, 50);
}
|
其中dfsFindPathFlag为全局标志遍历,记录是否找到终点。
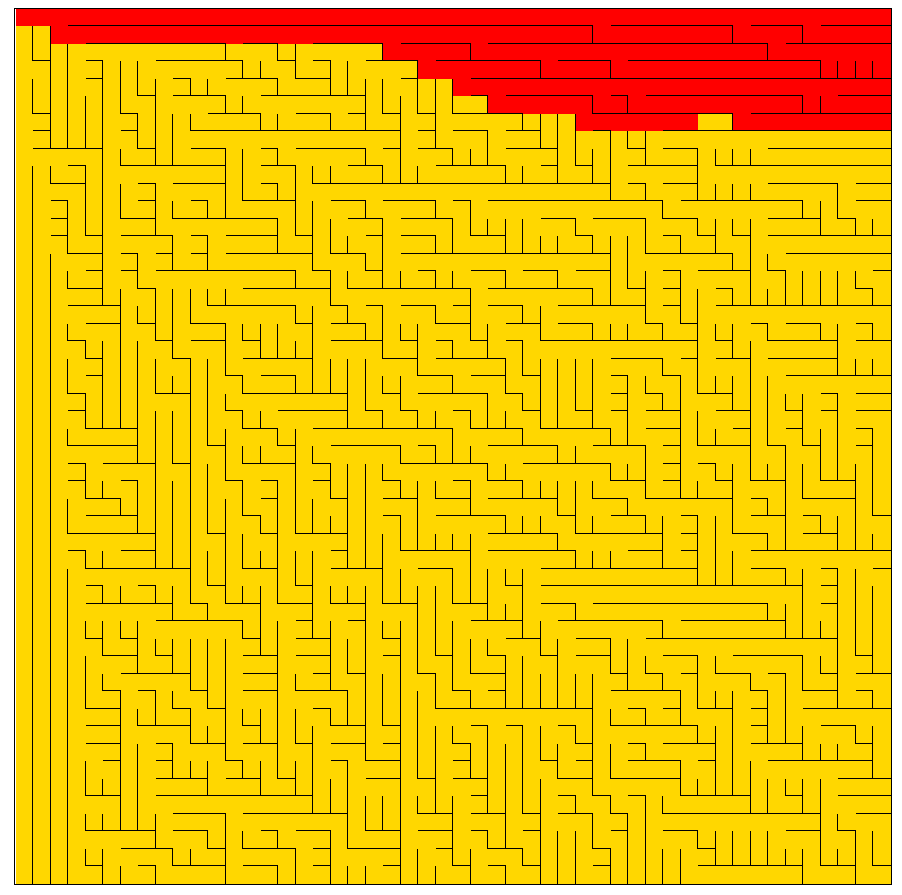
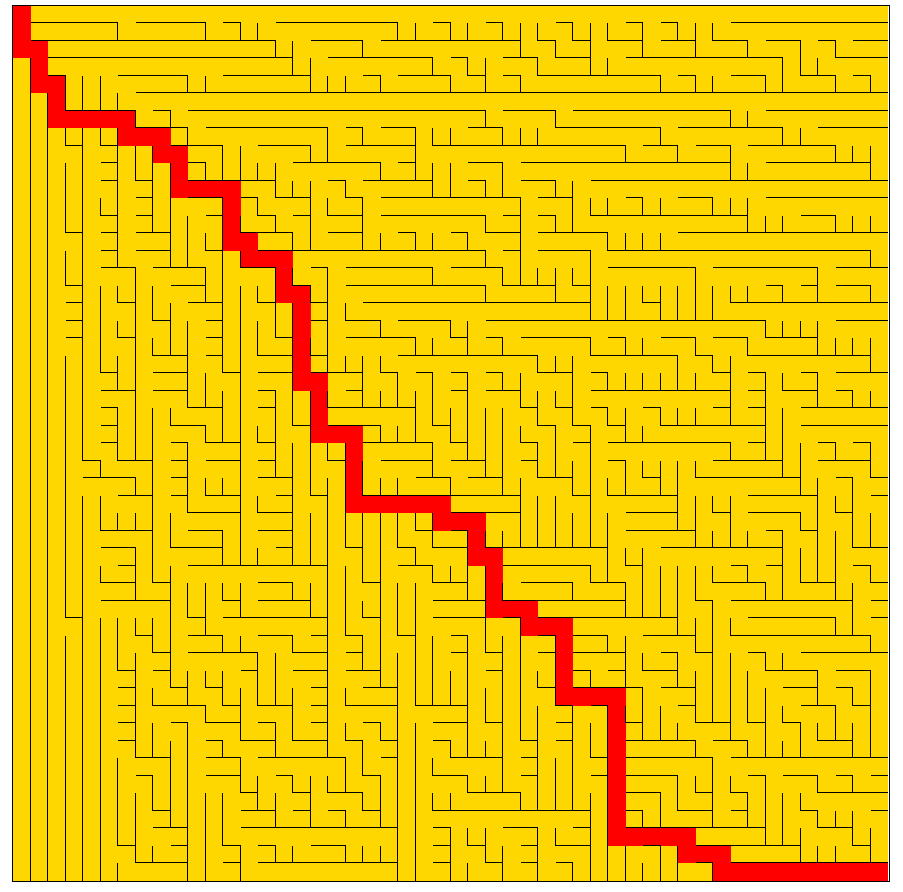
最终效果
广度优先搜索
算法思想
一层一层向外扩张。
算法步骤
1
2
3
4
| 1.初始队列为空,将第一个单元格加入队列
2.当队列不为空时
1.出队,置该单元格为已访问并加入记录路径
2.上右下左判断其相邻单元格是否可访问,若能,则入队
|
具体实现
1
2
3
4
5
6
7
8
9
10
11
12
13
14
15
16
17
18
19
20
21
22
23
24
25
26
27
28
29
30
31
32
33
34
35
36
37
38
39
40
41
42
43
44
45
46
|
function getShortestPathBFS(start, end) {
let queue = [];
let path = [];
for (let i = 0; i < n; i++) {
for (let j = 0; j < n; j++) {
maze[i][j].visited = false;
}
}
queue.push(maze[start][end]);
while (queue.length !== 0) {
let q = queue.shift();
path.push(q);
q.visited = true;
if (q.i - 1 >= 0 && !maze[q.i - 1][q.j].visited && getCubePosition(q.i - 1, q.j).className.indexOf("none-bottom") > 0) {
queue.push(maze[q.i - 1][q.j]);
}
if (q.j + 1 < n && !maze[q.i][q.j + 1].visited && getCubePosition(q.i, q.j).className.indexOf("none-right") > 0) {
queue.push(maze[q.i][q.j + 1]);
}
if (q.i + 1 < n && !maze[q.i + 1][q.j].visited && getCubePosition(q.i, q.j).className.indexOf("none-bottom") > 0) {
queue.push(maze[q.i + 1][q.j]);
}
if (q.j - 1 >= 0 && !maze[q.i][q.j - 1].visited && getCubePosition(q.i, q.j - 1).className.indexOf("none-right") > 0) {
queue.push(maze[q.i][q.j - 1]);
}
}
let s = 0;
let timer = setInterval(function () {
if (s === path.length || (path[s].i === n - 1 && path[s].j === n - 1)) {
clearInterval(timer);
return;
}
s++;
x = path[s].i;
y = path[s].j;
changeCubePosition(x, y);
}, 1);
}
|
最终效果
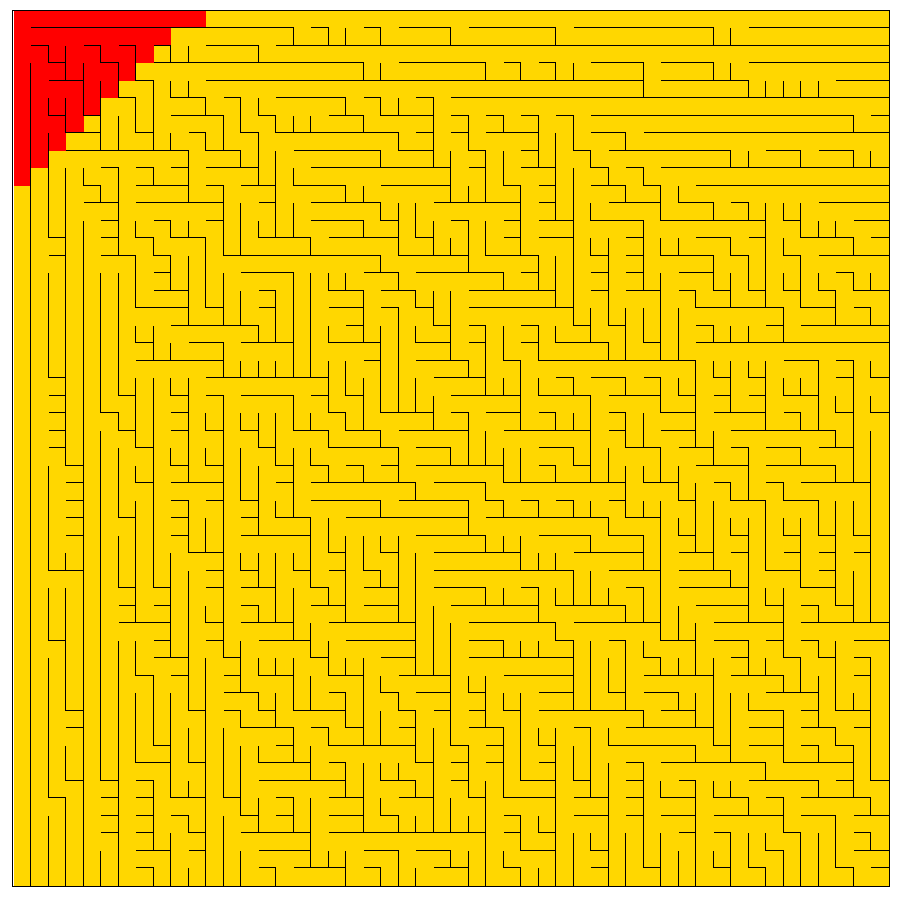
观察可以得到,广度优先搜索类似军队,步步为营,一层一层向外扩张的。其优点是可以找到起点到终点的最短路径。
广度最短路径
算法思想
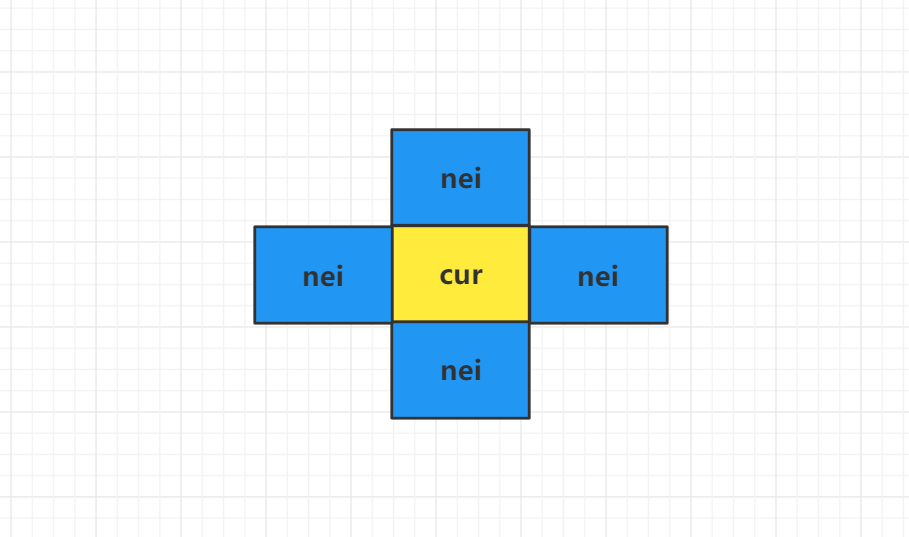
广度优先是一层一层向外扩张,我们可以画个图来表示一下:
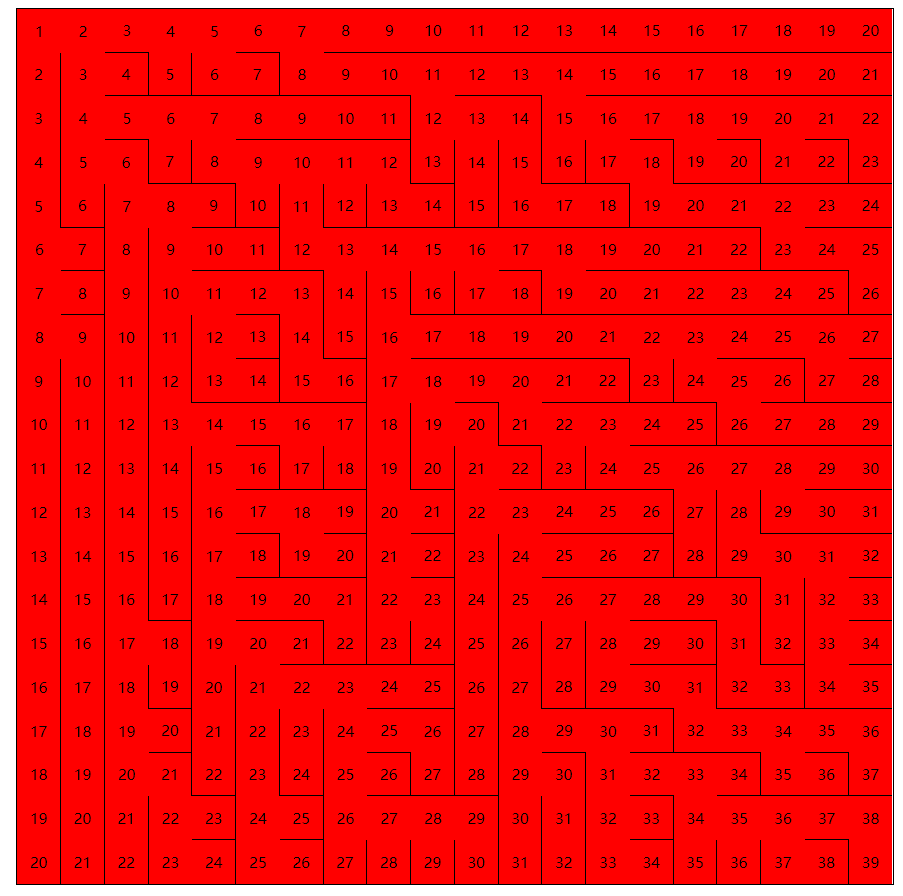
我们可以看到,从起点到终点,我将每一层的数字的标记起来。那么我们可以通过层数从终点来回溯推出最短路径。满足最短路径的条件有:
- 当前单元格与邻近单元格互通(即没有墙)
- 当前单元格层数大于邻近单元格层数
第二点需要说明一下,首先层序遍历的定义决定了起点单元格的层数必定是最小的,我们从终点沿着小于当前单元格层数的路径,肯定能找到起点
算法步骤
1
2
3
4
5
6
| 1.使用广度优先搜索求的所有路径及其层数,根据此结果集求最短路径
2.将终点加入结果数组中(这里数组添加采用头插)
3.遍历结果集
1.结果数组下标为0赋值为当前单元格
2.当前结果集遍历为目标单元格
3.判断当前单元格与目标单元格是否满足(互通且当前单元格层数大于目标单元格层数),能则加入结果数组
|
具体实现
1
2
3
4
5
6
7
8
9
10
11
12
13
14
15
16
17
18
19
20
21
22
23
24
25
26
27
28
29
30
31
32
33
34
35
36
37
38
39
40
41
42
43
44
45
46
47
48
49
50
51
52
53
54
55
56
57
58
59
60
61
62
63
64
65
66
67
68
69
70
71
72
73
74
75
76
77
78
79
80
81
82
83
84
85
86
87
88
89
90
91
92
93
94
95
96
97
98
|
function getShortestPathBFS(start, end) {
let queue = [];
let path = [];
for (let i = 0; i < n; i++) {
for (let j = 0; j < n; j++) {
maze[i][j].visited = false;
}
}
let layer = 1;
maze[start][end].layer = layer++;
queue.push(maze[start][end]);
path.push(maze[start][end]);
while (queue.length !== 0) {
for (let i = queue.length; i > 0; i--) {
let q = queue.shift();
path.push(q);
q.visited = true;
if (q.i - 1 >= 0 && !maze[q.i - 1][q.j].visited && getCubePosition(q.i - 1, q.j).className.indexOf("none-bottom") > 0) {
maze[q.i - 1][q.j].layer = layer;
queue.push(maze[q.i - 1][q.j]);
}
if (q.j + 1 < n && !maze[q.i][q.j + 1].visited && getCubePosition(q.i, q.j).className.indexOf("none-right") > 0) {
maze[q.i][q.j + 1].layer = layer;
queue.push(maze[q.i][q.j + 1]);
}
if (q.i + 1 < n && !maze[q.i + 1][q.j].visited && getCubePosition(q.i, q.j).className.indexOf("none-bottom") > 0) {
maze[q.i + 1][q.j].layer = layer;
queue.push(maze[q.i + 1][q.j]);
}
if (q.j - 1 >= 0 && !maze[q.i][q.j - 1].visited && getCubePosition(q.i, q.j - 1).className.indexOf("none-right") > 0) {
maze[q.i][q.j - 1].layer = layer;
queue.push(maze[q.i][q.j - 1]);
}
}
layer++;
}
let s = 0;
x = path[s].i;
y = path[s].j;
changeCubePosition(x, y);
timer = setInterval(function () {
if (s >= path.length || (path[s].i === n - 1 && path[s].j === n - 1)) {
clearInterval(timer);
return;
}
s++;
if (s >= path.length) {
clearInterval(timer);
return;
}
x = path[s].i;
y = path[s].j;
changeCubePosition(x, y);
}, 50);
}
function getShortestPath(path) {
let result = [];
result.push(maze[n - 1][n - 1]);
for (let i = path.length - 2; i >= 0; i--) {
let cur = result[0];
let nei = path[i];
if (reachable(cur, nei) && cur.layer > nei.layer) {
result.unshift(nei);
}
}
return result;
}
function reachable(cur, nei) {
if (cur.i - 1 >= 0 && cur.i - 1 === nei.i && cur.j === nei.j) {
return nei.class.indexOf("none-bottom") >= 0;
}
if (cur.j + 1 < n && cur.j + 1 === nei.j && cur.i === nei.i) {
return cur.class.indexOf("none-right") >= 0;
}
if (cur.i + 1 < n && cur.i + 1 === nei.i && cur.j === nei.j) {
return cur.class.indexOf("none-bottom") >= 0;
}
if (cur.j - 1 >= 0 && cur.j - 1 === nei.j && cur.i === nei.i) {
return nei.class.indexOf("none-right") >= 0;
}
return false;
}
|
最终效果
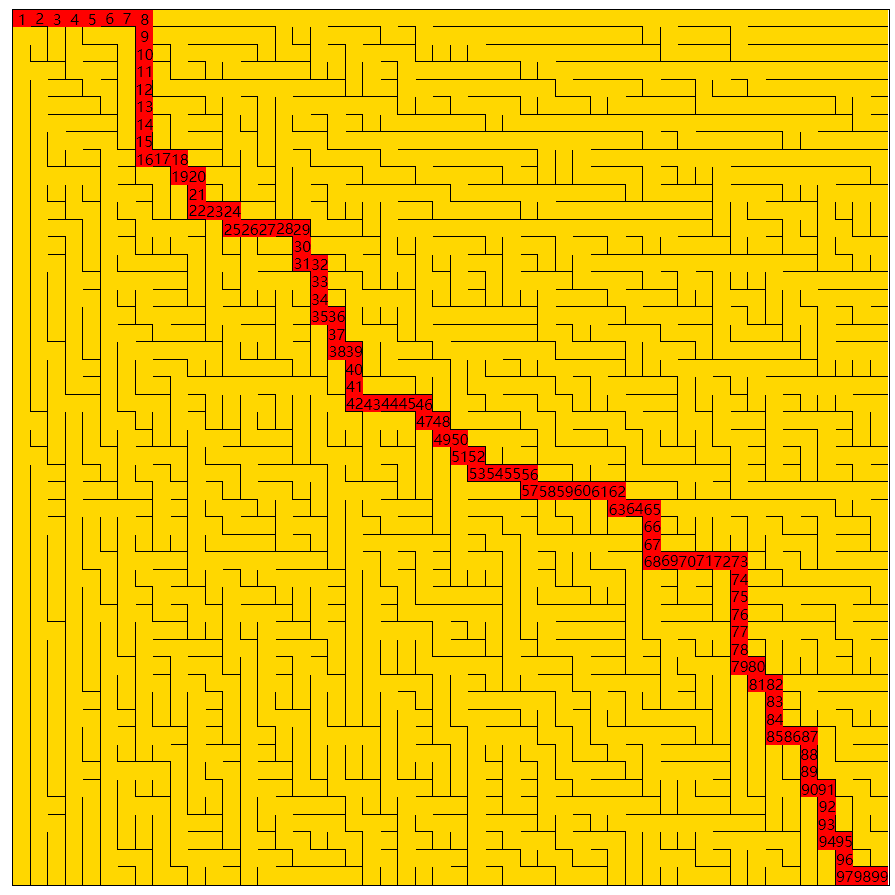
观察上图我们发现,路径中的数字是连起来的,说明已是最短路径。
两种路径对比
拿同一个迷宫距离,回溯法求得的路径为:
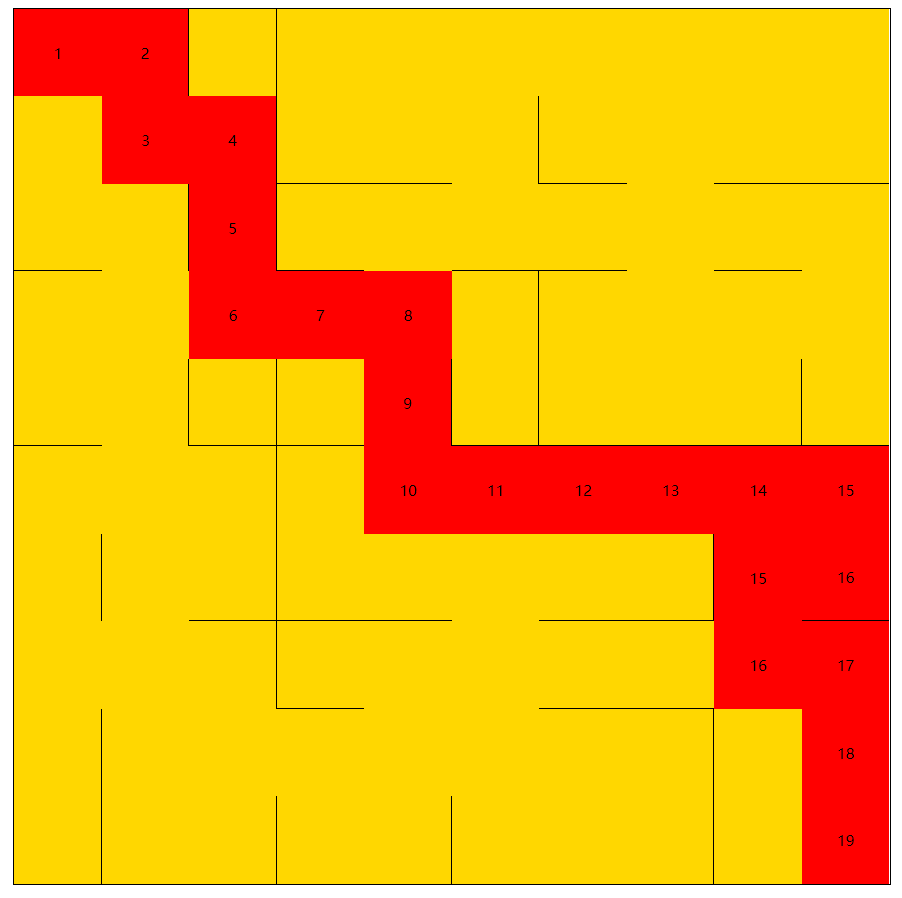
而通过广度优先求解出的最短路径为:

对比可以发现回溯法求解出来的路径层数是可能有重复,例如上图中的15,16,而广度优先求解出来的是没有重复的,即使最短。因为层数是不可能的跳跃的,这是由广度优先算法的定义所决定的。
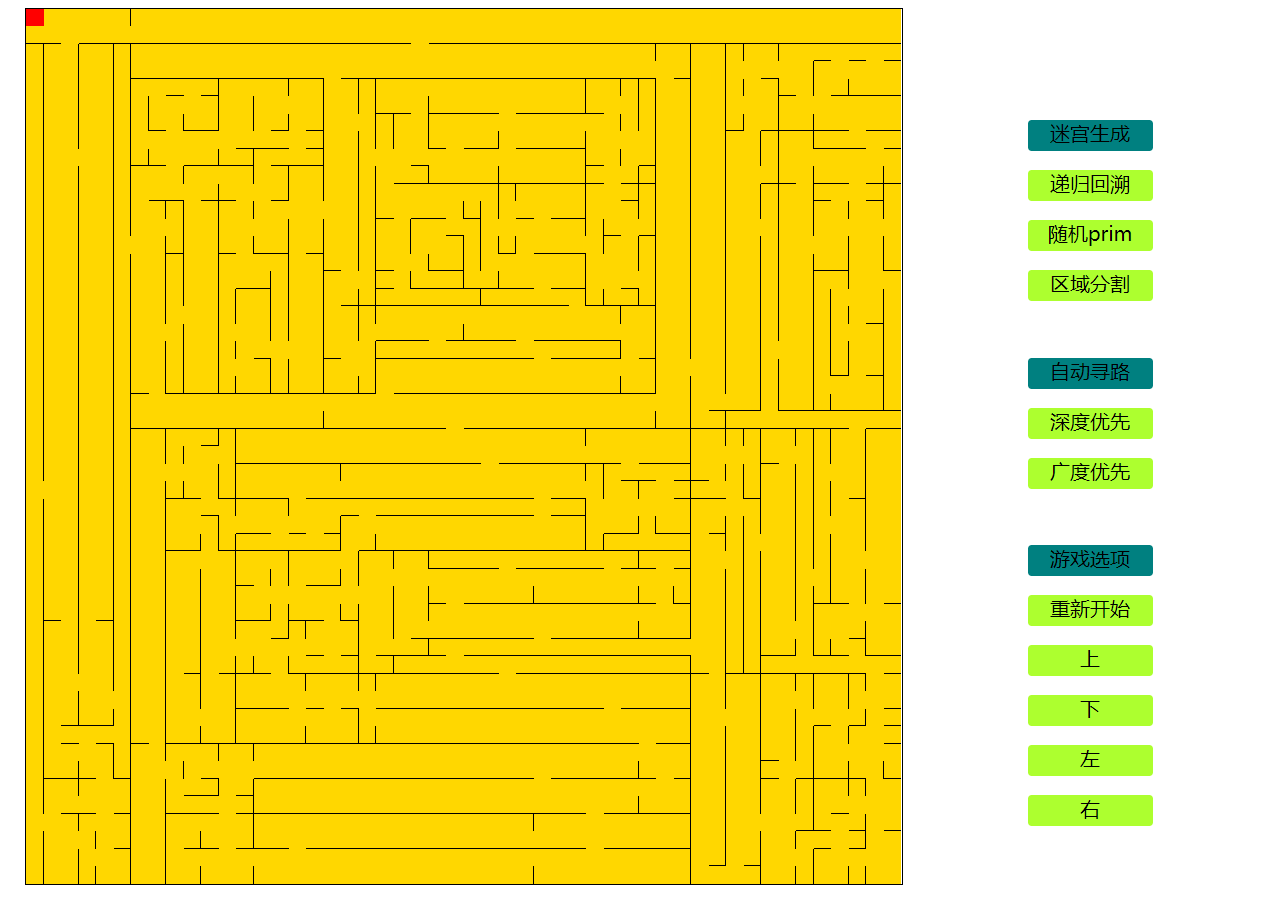
游戏整体交互
为了使游戏整体的交互性更强,我们增加一些操作面板供玩家选择。其中包括:
- 迷宫生成算法的选择
- 自动寻路算法的选择
- 开始游戏选择
- 游戏成功提示
- 游戏操作
最终效果如下:
完整的代码已经放在码云上,有需要的可以参考:迷宫游戏
参考文章: